
How to Add Captions & Subtitles to a Facebook Video
Here are the steps it takes to upload captions & subtitles to your Facebook videos. We guarantee 99% accuracy on all captions.


Captions on Facebook videos boost accessibility and engagement. Did you know that 85% of all Facebook videos are watched without sound? That is a ton of viewers that are going to want your video content captioned.
Ready to get started? Here are the steps it takes to add captions to your Facebook video!
1. Post your video
First, post your video to Facebook without captions.
2. Paste a URL to your Facebook Video
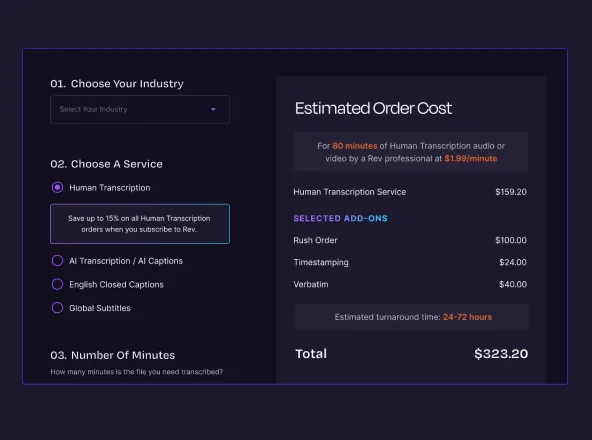
Paste the URL of your Facebook video here. Then go through the Rev caption/subtitle order process.
3. Rev will deliver your caption or subtitles file shortly.
You’ll receive an email when it’s complete
4. Once you have your Rev caption file, click “Edit this video” on your Facebook video
You may have to expand the post or hover over the thumbnail to see the option. You’ll see a tab that says “Captions.” Click that and you’ll see the options to either upload your SRT file or turn on the auto-captioning we mentioned earlier. Click “Upload file.”
5. Confirm that your captions file meets Facebook’s captions file naming convention
The Facebook naming convention looks like this: filename.[language code]_[country code].srt. If you got your caption file from Rev, you don’t have to worry! Just upload.
6. Toggle the captions on and off, and review for quality
Need subtitles in other languages besides English? Rev’s subtitle translation service translates English videos and adds subtitles in a variety of languages. This is great if you’re trying to reach customers in other languages.
Add Captions to Your Facebook Video
Why Add Captions & Subtitles to Facebook Videos?
For these reasons and others, many vloggers and other video content producers opt to add their own captions to Facebook videos. But that caption integration requires some nuances. Facebook puts the burden of identifying the language in the captions on their users, as well as adding the country code for the language’s nation of origin. Even if you only have one captions file and Facebook knows your preferred language, the site doesn’t automatically make the connection.
Facebook’s Caption Requirements
Facebook requires you to put a language suffix on all your caption files, even if your language is English. Someone in the US uploading a captions file in Spanish to a Facebook video needs to title their file something like “captions.es_LA.srt”. This is because even though the speaker is in the US, and so are their viewers, the Spanish language didn’t originate here, so “LA” is the generic country code for Spanish.
When you have to upload captions to multiple versions of a video, or just simply aren’t paying attention, this small element can become a bit of a hassle. That’s why we offer the option of delivering your captions files with this save name already applied at no extra charge. Of course, since other sites don’t have the same rules, you’ll be able to use the file on all your channels at once, without having to remember to rename it.

This might seem like a small detail, but it’s got lots of our faithful customers excited that one less task is on their plate. Here’s what our customers are saying:


What About Facebook Ads?
You can create Facebook video ads in the following ways:
1. Slideshow
Facebook allows you to build an engaging video story using photos and text. You can use images you own or source stock images.
2. Stories
Facebook’s Ads Manager offers templates so you can turn your existing videos into story ads.
3. Boosting a post
Create a video post for your business page, and boost it. This turns the post into an ad that will help you reach a much larger audience.
How to get a SubRip (.srt) caption file for your Facebook ads
You can create and upload your own captions to your Facebook video. But, to do this you’ll need to generate and upload a SubRip file with the captions. That takes valuable time and know-how. Especially since Facebook is specific about the naming conventions of the .srt file. For every .srt file you upload, the file name should follow this format: filename.[two-letter language code]_[two-letter country code].srt. For example, filename.en_US.srt. Facebook has a handy list of country codes. Instead of taking time to create that manually, we can deliver it in no time at all. Here’s how to use our services to generate them easily and accurately.
1. Go to the Rev Closed Captions page
2. Click “Upload Files.” You can click “Paste a URL” if your video ad is already on Facebook
3. Choose your video file or live video URL
4. Select SubRip (.srt) as your “Output File Format” in Rev
5. Complete the checkout process.
How to import caption files into Facebook video ads
Now that you’ve received your .srt file. Here’s how to integrate your captions with your Facebook ad.
- Go to Ads Manager.
- Click + Create.
- Choose an objective and then click Continue.
- Choose your targeting, placements and budget and then click Continue.
- In the Formats section, choose Single Video or Slideshow.
- Click Upload Video / Upload Slideshow or Browse Library to find a video for your ad.
- In the Video Captions section, choose Upload Your Own.
- In the window that appears, click Select file and find the .srt file you wish to upload.
- After you select the file, click Save. Your captions upload to the video or slideshow.
Using Facebook to automatically generate captions
You can also use Facebook to automatically generate captions for your video. However, this feature only works for captions in English. Additionally, they can be every inaccurate so you will likely need to take time to edit them. Facebook uses automatic speech recognition (ASR) technology to generate these captions. Unfortunately, it is not always the most effective way to create accurate captions. Rev’s captioning service uses real people to create captions for your video with a 99%+ accuracy rate.
Here’s how to use Facebook to generate your captions.
- Go to Ads Manager.
- Click + Create.
- Choose an objective and then click Continue.
- Choose your targeting, placements and budget and then click Continue.
- In the Formats section, choose Single Video or Slideshow.
- Click Upload Video / Upload Slideshow or Browse Library to find a video for your ad.
- In the Video Captions section, choose Generate Automatically. If your video doesn’t have sound or Facebook’s system can’t detect sound from the video, you may see Manually Add Captions instead.
- In the Review Your Captions window, hover over the caption and edit or delete the caption, edit the length of time for the caption or insert a new caption. Tip: To keep the video from playing when entering a caption, click to check the box next to Pause video while typing.
- Click Save To Video. Your captions upload to the video or slideshow.
- (Optional) Click Options to delete, share or download the captions to your computer. If you share the captions, you can generate a link to your captions that expires after 72 hours.
Editing captions in Facebook video ads
Editing captions that are attached to your Facebook video is easy. However, It is important to know that when you add captions to a video ad, you are adding them to the native video and not just to the ad. That means if you decide to include the video in a new ad, the captions will appear with it. If you make a change captions in a subsequent video ad, those changes will propagate across ever ad that uses the video. If you would like to use specific captions for each ad, you may want to consider uploading a new video and caption file for each ad.
Here’s how to edit the captions in your Facebook videos step-by-step:
- Go to your page
- In the Publishing Tools tab select Video Library
- Choose the video you would like to edit, and select Edit Video
- Click on Subtitles & Captions. Your captions will be in the Captions Added tab
- Click on the pencil icon to review and edit your captions.
Wrap-up
Technology is always evolving, and maybe soon adding closed captions to Facebook videos won’t be a task. Until then, we’ve got your back.
Rather have the captions added straight to your videos? Rev now offers burned-in captions (open captions). Just check the “burned-in captions” box at checkout and you’ll receive a video with permanent, hard-coded captions added straight to your videos. Also available for foreign language subtitles!