How to Add Captions & Subtitles to Poly Recordings
Remote work is growing at an unprecedented rate. In the US alone, 4.7 million employees work from home at least half the week, and 44% of employees say that part of their team is full-time remote.
There are several benefits of remote working, including:
- Unlimited access to global talent
- Increased productivity rates
- Cost savings
- Flexibility of workspace
- Social distancing during the pandemic
- And more!
As remote work increases daily, there remains a pressing need for improved communication. In other words, it’s critical for businesses to be able to reach all of their remote employees just as successfully as if they were physically present in the office.
How do you accomplish this? You need a remote video conferencing tool like Polycom (now Poly) that connects all your team members.
Poly.com offers a diverse product base with tools to fit any platform, industry, and workspace.
This article will focus on how leaders can use Polycom® RealPresence® to capture video meetings, record them, and add captions or subtitles with the help of Rev.
How to set up a meeting in Poly
The first step in connecting your remote employees is setting up a meeting in Poly. Here’s how:
- Navigate to the RealPresence Web Suite Services Portal home page, and click Schedule Meeting.
- Once you are on the page to schedule a meeting, fill out all the necessary contact information, including who you are inviting, the subject, the agenda, the schedule, time zones, and more.
- You can also add documents to meeting invites by dragging and dropping files in the indicated area.
- To set up a meeting passcode, you can select “Use Personal VMR” and enter a VMR number and passcode from the RealPresence DMA system. Alternatively, you can select “meeting passcode” and add a numeric passcode. You can also select “Chairperson passcode,” to add a passcode for the host.
- Next, choose additional options like “Allow only Enterprise Users,” “Allow participants to upload documents,” and more.
- Finally, click “Schedule.”
Once you click on “Schedule,” you’re ready to roll.How to record Polycom video conferencesThere are two ways you can record a Polycom video conference. First, you can record a meeting using RealPresence Desktop via Polycom® RealPresence® Collaboration Server DTMF codes.The only person that can record a meeting is the host (chairperson). Here’s how to record your meeting via the desktop.
- Click “Option Menu”
- Select “Keypad”
- Enter the respective DTMF codes:
- *2 Start or resume recording.
- *3 Stop recording.
- *1 Pause recording.
The alternative method of recording a meeting is to record in a web browser directly from the RealPresence Web Suite Experience Portal interface.Again, only the Chairperson can record the meeting. Guests will not be able to record anything using this software. Here’s how to record via the desktop option:
- Click “Record” and you will see a red button showing that you’re recording. The notification bar will also display a message that the recording started.
- Click “Record” again to stop the recording.
That’s it!
How to get the Poly recording file
If you want to add closed captions on Polycom media suite or subtitles, then the first step is to access the recording file.
Thankfully, Poly makes this easy.
After your meeting, you will get an email notification for your completed live event. You will also get an email notification that has the archive name, the quick code for playback, links to view the meeting recordings, and links to download the meeting recordings.
Click on the links to download the meeting recordings, and download the file you want to add captions or subtitles to.
How to upload that Poly recording to Rev for captions or subtitles
Now that you have the recording of the meeting downloaded to your desktop, you can use Rev to order captions or subtitles.
Start by creating an account at Rev.com and login to your account.
After you log in to your Rev account, Rev will give you options, including captions and foreign subtitles. To add captions, click “captions.”
Then, click on “learn more.” Rev will direct you to a new page with additional information. Click on “get started.”
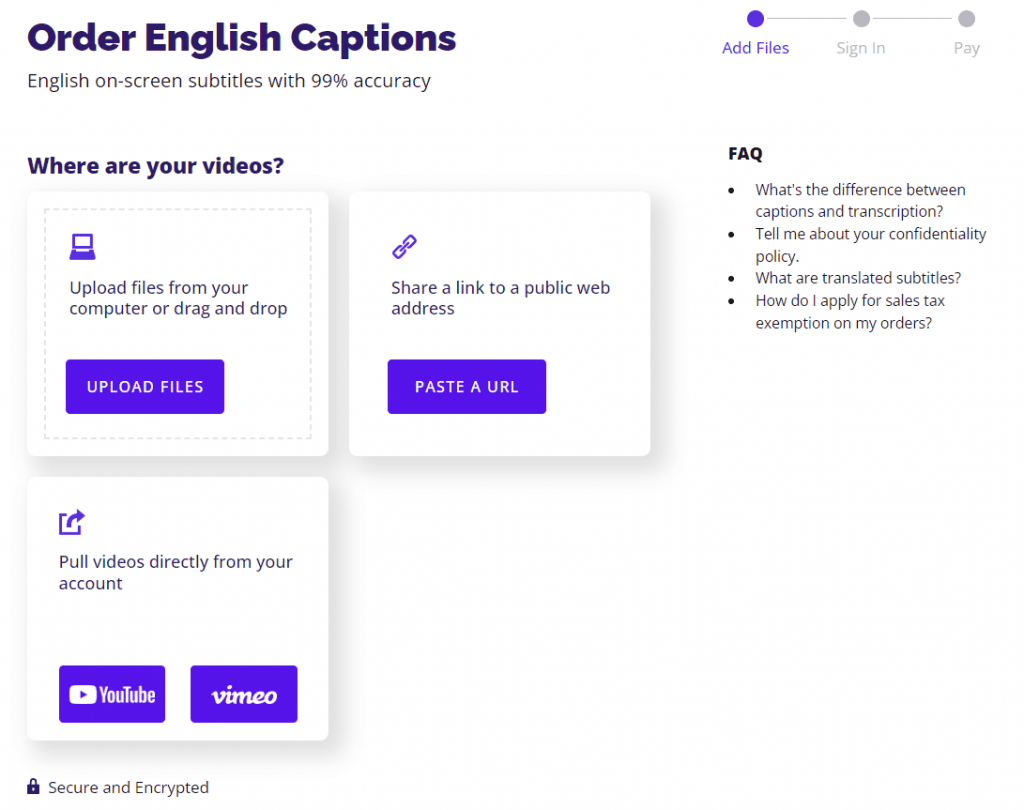
On the next page, you can upload files from your computer, share a link to a public web address, or pull videos from YouTube or Vimeo.
Since you downloaded your video from Poly, click on “Upload Files” and select the file you downloaded.

Next, click “Upload,” and wait for your file to upload.
Once your file is uploaded, Rev will direct you to a new page where you can order captioning. Rev will give you a price for captioning based on the number of minutes of your recording.
Once you press “order” and pay for your order, the team at Rev will work on your order and deliver it as soon as possible.
If you want to order subtitles, you follow the exact same process, except you choose “foreign subtitles” at the beginning instead of “captions.”
Once the Rev team has completed the captions or subtitles, you can redistribute your video to your team.
Subscribe to The Rev Blog
Sign up to get Rev content delivered straight to your inbox.


